Adopting Portable X-Rays Into Your Practice

adopting portabl x-rays into your practice - digital doc

Adopting Portable X-Rays Into Your Practice

If you haven’t incorporated portable handheld x-rays into your dental practice, you are missing out on a lot of benefits that these devices bring. In this article, you’ll discover how adopting Digital Doc’s XTG Handheld X-Ray will transform your dental practice.

Employees’ Work Is Eased

Sometimes you don’t realize how much of an asset dental technology can be until you use it. When your employees use the portable XTG Handheld X-Ray frequently, they’ll realize how easy it is to set up and capture images. All that the employees have to do is to power it up, take aim, and start capturing images. No more wasting time walking in and out of the operatory with every shot taken.

As the portable x-ray eases the work of employees, it frees them to be more productive and build rapport with each patient. This increased productively has a direct positive effect on the bottom line of your dental practice.

Patient Experience

The dental industry is more and more competitive today.  Are you accepting new patients?   Would you like this number to continue to increase?  Investing in technology such as XTG hand-held X-ray and communicating this to your patients will improve their experience.  Improving patient experience will result in more new patients.  People talk about their experiences, both positive and negative.  The conversation could go something like this: “Jim, we are always looking for ways to improve your experience.  We just invested in hand-held x-ray, which allows us to reduce the time it takes us to take your Xrays by half the time.   It is very safe.  So much so, I get to stay in the room with you. What do you think?”

Instant Diagnosis is Possible

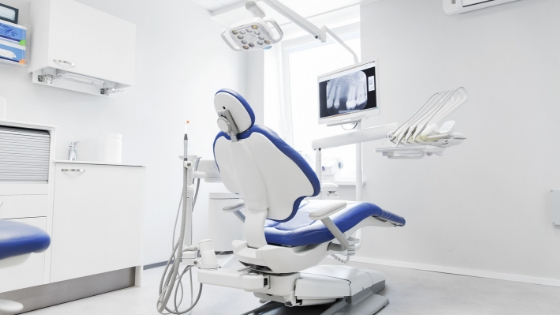
Traditional x-rays are a time-consuming process for both the patient and the dental care provider. Digital handheld x-rays and intraoral cameras collapse this time because the images captured are beamed onto the screen available in the operatory as soon as the image is taken. Faster diagnosis means treatment can be commenced sooner, and patients can make an informed decision while the image is still vivid in the minds.

Storage of Patient Records is Eased

It is also easier to maintain patients’ records after switching to digital dental technology, such as the LUM sub-enamel illumination device, the xtg2go portable x-ray, and the IRIS HD digital intraoral camera. The images captured using the portable x-ray or the digital intraoral camera can be sent directly to the digital file of each patient. It is therefore easy to retrieve this patient data since it is all stored in one place, and there’s no need for staff to archive records manually.

As you can see, your dental practice can benefit from adopting portable x-ray equipment. Talk to the experts at Digital Doc and learn how you integrate this portable digital x-ray equipment in your practice today. As always, SEE More.  DO More.

IRIS X80 Intraoral Camera

Digital Doc Iris x80 intraoral camera

We are thrilled to introduce X80, liquid lens autofocus HD camera.  This camera is plug and play. No training needed. The liquid lens goes from Full Face to Macro and stops on a dime.  We live in an HD world today and believe patients know the difference between SD and HD, then expect it. We expect to deliver industry-leading products that improves efficiency and case acceptance. We call it SEE More. DO More

Liquid Lens Auto Focus

The IRIS X80 intraoral camera comes with a Liquid Lens Auto Focus capability that means that you or your dental assistants will no longer have to press any buttons to focus the camera before capturing an image. The autofocus feature takes care of all this. All you have to do is press the capture button to have crisp, clear images of your patients’ dental structures. This is made possible by an internal computer that monitors the image that you would like to capture, and this internal computer adjusts the focus automatically whether you would like an image of a micro area or a wide-angle version.

Dual Capture Buttons

The fact that most people are right-handed has caused left-handed users a lot of grief because they have been compelled to adapt to using tools that aren’t designed with them in mind. You won’t have to worry about this thanks to the IRIS X80 intraoral camera. This exciting new digital camera comes with a capture button on either side so that you or your staff can use the button which corresponds to their preferred hand for performing such tasks. For those who are comfortable using both hands, the IRIS X80 now allows you to alternate the side you use to engage the capture button!

Ease of Use

Digital intraoral cameras just got a whole lot easier to use with the introduction of the IRIS X80. Users simply take the camera out of its box, plug it in and start capturing images right away! No need to tinker with multiple settings or read through a whole manual. This ease of use is a true time-saver in a busy dental office.

Impact and Chemical Resistant Body

Digital Doc is familiar with the different chemicals and chemical cleaners used in dental offices, as well as the likelihood that equipment will bump against surfaces from time to time. For this reason, the IRIS X80 intraoral camera has been designed to be highly resistant to impact and chemicals. Additionally, the body is seamless, further protecting the internal components from exposure to body fluids (blood and saliva, for example) and cleaning solutions. You can, therefore, be sure that your new IRIS X80 dental camera will serve you for years to come without easily succumbing to the effects of accidental bumps or chemical intrusion.

USB 2.0 Compatibility

The IRIS X80 intraoral camera will not require you to modify your present setup of the operatory, nor will it require you to buy any additional accessories so that you can use it. This new camera can be used with the standard USB 2.0 protocol so that it will fit seamlessly into your workflow.

The IRIS X80 comes with a load of other great features which you can experience for yourself by scheduling an in-office or virtual demonstration with us at Digital Doc. With the IRIS X80 intraoral camera, you will be able to SEE MORE and DO MORE!


Portable Dental X-Rays Basic Training

portable dental x-rays

Portable Dental X-Rays Basic Training

There are so many benefits to portable dental x-rays. Once you’ve decided to upgrade your traditional x-ray machine to an XTG Handheld X-ray, you’ll need to learn how to use it. 

The XTG Handheld X-Ray device can capture 150 images a day, and these are more than a typical office will need, so there is no need to worry about the charge on the battery. Use the following steps to get started with your new device so that you enjoy faster setup, better quality images, and reduced radiation exposure of your patients.

Powering Up Your Handheld X-Ray

Take the tower port on the USB cable and plug it into a port on the XTG device. Next, press the power “On” button to activate the unit. The display will show you the status of the battery charge and the current tooth image option you can capture immediately. The settings could indicate “Adult” or “Pedo.”

Selecting/Saving Image Settings

The “S” button on the unit changes the tooth settings to what you require. To make any changes. Press the up or down button next to the “S” button to adjust the exposure setting. Press the “S” button and hold it down for 2 seconds to save the current settings shown on the device’s display screen. For example, the screen may be indicating “Adult,” and you want to save these settings used to capture images of adults. To do this, press down the “S” button for two seconds and the “ready” light will turn on to confirm that you have saved the settings. These saved settings now form part of your preset settings that you can quickly access.

To change from the adult to pediatric settings, touch the “S” button and press it, so it stays down. Next, touch the power button and then touch the “S” button again. The display will change to “pedo,” and you can take x-rays of kids.

To keep it in the pedo position, touch the power button, then the “S” button and the x-ray will show the green ready light.

Switching to Another Preset Setting

To turn back to the adult settings, hold the “S” button down again, touch the power off button, touch the “S” button again and you will be taken back to the adult settings. And that really is all you need in terms of setting up your brand new XTG Handheld X-Ray unit.

Taking X-Ray Images

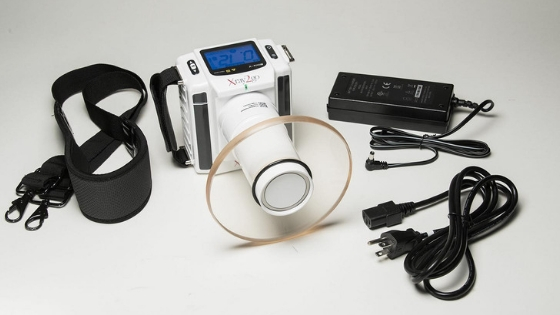
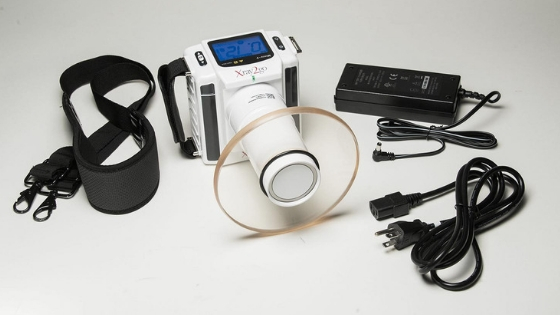
To capture an exposure, use your right hand to hold the XTG so that it rests in the palm of that hand. Keep your first finger protruding to the front of the device. The exposure button is right there at the right-hand corner at the front. Now move the hand holding the device away from your body so that you don’t feel the weight of the XTG Handheld X-Ray unit. You can take all x-rays using just one hand because the strap over your shoulder balances out the weight. Now point the device, then touch and hold down the exposure button. You will hear three beeps, and the device screen will go back to green showing that you are ready to take another image if you want to.

That is a summary of all you need to use your xray2go. For more detailed instructions on how to set up and use the XTG, search YouTube for XTG by Digital Doc, and you will find an 11-minute instructional video to give you a more in-depth explanation of the steps in this blog post.


3 Essentials for Successful X-Ray Acquisition

essentials for successful x-ray acquisition

3 Essentials for Successful X-Ray Acquisition

X-ray images play a big role in any dental office as dental healthcare practitioners look for caries, impacted teeth, cysts, gum disease or any other dental anomaly. The best x-ray images are produced by the most appropriate x-ray equipment for your dental office. You should, therefore, consider the following factors as you shop for a replacement or additional x-ray machine for your dental office.

Patient Comfort

It can be nearly impossible for you to capture x-ray images of high quality if your patient isn’t comfortable while you take those images. Your first step in the quest for high-quality x-ray images is therefore to find x-ray equipment that will ensure the highest level of patient comfort.

The XTG Handheld X-Ray, also known as the Xray2go, is one piece of equipment that will address your concerns about patient comfort while radiographic images are captured.

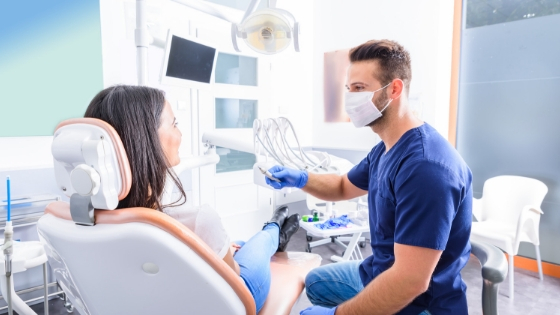
This device allows you to get the x-ray images you want while the patient is sitting in the dental chair. The patient is comfortable because they are in a familiar room with a familiar person (you). The patient will remain relaxed while you capture all the different images you need to make an accurate diagnosis.

Equipment Quality

As you may know, any craftsman is often as good as the tools that he or she uses. The same applies to dental health professionals. You cannot expect to capture high-quality images using poor quality equipment.

So, you should be on the lookout for high-quality equipment as you shop for new x-ray equipment for your dental office. Consider manufacturers who have a history of availing reliable equipment that can serve for the stipulated service life without a drop in the quality of the images captured.

The Xray2go is one of the portable x-ray machines that will attract your attention when you rank the different pieces of equipment on the market in terms of their quality. This portable x-ray will come in handy to confirm any suspicions that you may have after viewing a patient’s oral structures with the help of the LUM sub-enamel illumination device.

While you evaluate the x-ray equipment quality, don’t forget to assess how many images you need to take each day so that what you buy can cope with that load. For example, the XTG Handheld X-Ray can capture at least 150 images before the battery power drops and you have to recharge it. This capacity is more than sufficient for most dental offices, so the x-ray can work all day and be recharged at night.

Workflow Optimization

Dentistry has progressed to a level where dental care professionals don’t have the luxury to take days or weeks before giving a patient diagnosis or even performing the necessary procedure. For example, same-day dental restorations (crowns, for example) are becoming the norm due to the availability of modern equipment.

You should consider how the x-ray equipment will ease or complicate the workflow at your dental office before you procure that equipment. Confirm that the software upon which the equipment you want to buy operates can be integrated with your patient management system.

The XTG Handheld X-Ray is superb in this regard because it can easily export the images captured to the digital patient files. All this is possible due to the compatibility of this equipment’s software with nearly all patient management systems available.

As you can see, the process of acquiring x-ray equipment for your dental office should be systematic so that you will be in a position to weed out the equipment that isn’t suited to the specific needs of your dental office. You can further smoothen the acquisition process by involving the supplier as early as possible so that the transition can be properly planned. Be sure to train your staff on how to use the new x-ray equipment, as well as any complementary technology like the LUM sub-enamel illumination device.

The Key to Modern Day Root Canals

essentials to modern day root canals

The Key to Modern Day Root Canals

The modern dental patient expects their dental care provider to use the latest technology, deliver better outcomes, and be willing to schedule procedures at the convenience of the patient. Dental care providers are scrambling to improve the way they deliver their services in order to meet these expectations of their patients. This article discusses five essentials that can help to deliver modern-day root canals that meet all the expectations of patients.

XTG Handheld X-Ray

If you’ve used Digital Doc’s XTG Handheld X-ray, you’ll wonder how you managed to perform root canals in the past. This Xray2go allows you to remain in the operatory and take radiographic images of your patient while they are in the dental chair. Root canals are one of the procedures that patients don’t look forward to undergoing, but with this tool, you can increase the convenience factor for your patients because they don’t have to be shuffled to the radiology room and then back to complete their treatment.

The handheld x-ray also gives you high-quality images that can help you to deliver treatment outcomes that can only be dreamed about by those using the traditional x-ray machines.

An IRIS Intraoral Camera

While endodontists largely treat patients who have been referred by dentists, the records sent along with the referral may not provide an accurate depiction of the patient’s tooth before the root canal treatment is undertaken.

It is therefore helpful for you to have an intraoral camera like the IRIS USB 2.0 Chair Dental Camera so that you can take high-quality images to complement what has been captured by the XTG Handheld X-Ray.

Effective Communication

It is one thing to communicate, and it is another thing to communicate effectively. For example, you wouldn’t use the same diction that you use when communicating with a referring dentist to talk to a patient, would you?

It is important for you to communicate effectively with all parties, such as your patients, the specialists and referring dentists if you want to deliver better root canals.

Luckily, modern digital dentistry equipment like the LUM and XTG Handheld X-Ray make it possible for all parties to be on the same page. For instance, you can take images with your IRIS Intraoral camera and show the patient what exactly you are going to fix during the root canal treatment. The same images can be used if you need to communicate with referring dentists so that everyone is kept in the loop during each stage of the treatment.

Knowledgeable Staff

Another important factor for endodontists who wish to perform modern-day root canals that meet all the expectations of patients is knowledgeable staff. Your staff should be conversant with the workings of all your modern equipment, such as the Xray2go. They should also be familiar with how that equipment delivers outstanding outcomes for your patients.

Such mastery can only happen if you, the endodontist, set the example and arrange to have your staff trained each time you introduce new technology or methods of delivering patient care. Your staff will then convey their expertise to the patients, and the net result will be superior root canal outcomes when compared to other offices.

Once you have all the essential components above in place, there will be nothing standing in the way of delivering modern root canal treatments. As you may know, word of mouth spreads fast, so your practice will grow as a result of all the positive reviews made by any patient who undergoes root canal therapy at your office.

XTG Handheld X-Ray Shines During Dental Mission Trip

XTG handheld x-ray

XTG Handheld X-Ray Shines During Dental Mission to Haiti

It is easy to take things for granted when you live in the developed world. We often forget about the struggles third world countries face, such as access to food, clean water, and shelter. These countries also have little or no access to basic dental care. So, the vast majority of the population are living a poor quality of life (severe pain, inability to eat properly, premature tooth loss, gum disease, etc.)

As a way of giving back to humanity, Dr. Chris Hansen of Two Rivers Family Dental and a team of dental professionals went on a mission to Los Cacaos, a remote part of Haiti, for 10 days. Their mission was to provide free dental services to people from the villagers in Los Cacaos and the surrounding areas. Dr. Hansen and his team set off on February 14 determined to do what they could to ease the pain and suffering of locals.

Dental missions are hard to pull off because doctors don’t have access to the same dental equipment and materials they normally would at a dental care facility. On mission trips, you have to make do with makeshift facilities, often performing dental procedures wherever necessary.

All this would not have been possible without portable dentistry equipment, such as the Xray2go, a handheld compact x-ray machine that produces high-quality radiographic images.

In Dr. Hansen’s own words, “We were so fortunate to have a portable X-ray2go from our friends at Digital Doc! They have been generous partners in dental missions!” Her words speak volumes about how valuable the XTG Handheld X-ray can be when you need dental services on the go.

The XTG Handheld X-Ray took it all in stride and delivered high-quality x-ray images a day in and day out right to the very end! In total, the dental mission team performed 4 dental cleanings, 56 dental restorations, 573 tooth extractions, and 11 Silver Diamine Fluoride (SDF) treatments. The faithful and reliable Xray2go was there to provide all the radiographic images needed to perform the vast majority of those procedures.

The innovations that have brought portable handheld x-ray machines like the X-ray2go and other compact dental equipment like the LUM sub-enamel illumination device have made it possible to offer dental care just about anywhere. Dental offices that participate in dental missions or other outreach services should take advantage of the functionality and quality these products provide. Contact Digital Doc today for a FREE demo!

Things to Remember About Intraoral Camera Maintenance

Intraoral Camera Maintenance - Digital Doc

Things to Remember About Intraoral Camera Maintenance

All dental offices know how important it is to take every step necessary to ensure infection control. That same zeal also needs to be devoted to taking care of and preserving the condition of the costly dental equipment which facilitates accurate diagnosis and treatment. The IRIS HD USB 3.0 Dental Camera, the XRay2Go or XTG Handheld X-Ray machine and the LUM sub-enamel illumination devices are examples of diagnostic equipment that every dental office should take care of properly. This article discusses some of the crucial disinfecting measures that will help you to not only maintain but increase the longevity of your equipment.

Step #1: Sheaths for Asepsis and Fogging

The IRIS camera sheaths are specifically designed for IRIS cameras only.  The optically clear side is on the bottom so you want to put the camera light towards the white paper.  The Sheath is not required to be used with the cameras since you can wipe the camera down with a disinfectant wipe; however, you will prevent fogging by adding the sheath. We all have those patients when we ask them to breath out of their nose and they do the opposite.  

Step #2: Refer to the User Manual

No two manufacturers make intraoral cameras the same way. It is therefore prudent for you to read the user manual of your IRIS intraoral camera and find out what the manufacturer recommends as the right way to clean or maintain this particular piece of dental equipment.

For example, one manufacturer may recommend that you use an alcohol wipe to clean the lens of the camera while another might forbid it. Follow the specific recommendations provided in the manual so that your camera isn’t damaged during the cleaning process. The advice of following the manufacturer’s instructions also applies to any other dental equipment that you may have, such as the LUM sub-enamel illumination device and the XTG Handheld X-Ray machine.

Step #3: Place Your Intraoral Camera on a Surface You Can Disinfect

The third step that you should take is to place the IRIS Intraoral camera on a sterile surface or on a disposable liner. Once the camera is on that surface, dispose of the gloves that you wore while taking intraoral images of the patient.

After taking the gloves off, proceed to wash your hands thoroughly. This added precaution is necessary because there’s a possibility that you came in contact with the patient’s fluids. After washing and drying your hands, wear fresh gloves and proceed with the next steps of the process.

Step #4: Wipe the Camera Down

You should always wipe down the entire camera using Digi Wipes, which are scientifically proven to have superior disinfection properties compared to other medical wipes on the market. Don’t use the wipes picked from the grocery store! The wipes used to clean your camera must be specifically designed for this role.

Step #5: Connect the Cable and Store the IRIS Intraoral Camera

Once the camera is dry, reconnect its USB cable and place the camera in a fresh sheath. Thereafter, place the camera in its storage place or on a sterile surface, such as a tray, if you intend to use it again. Discard the gloves you wore while cleaning the IRIS 2.0 Dental Camera for Windows.

The steps above should be mastered by every member of your staff. Insist that they follow those steps every single time without any exceptions. That way, your equipment will not be an instrument of cross-contamination or provision of inaccurate images.

The Safety of Portable Dental X-ray Machines

the safety of portable dental x-ray machines

The Safety of Portable Dental X-ray Machines

Dental X-ray devices are extensively used in dental treatment just like the LUM Sub-Enamel Illumination device. In order to serve patients well, clinicians should be aware of and prepared for the hazards of using x-rays. X-rays emit radiation, which can prove to be significantly risky for patients if not used appropriately. Operating an x-ray machine is not as simple as pushing a couple of buttons, technicians should train themselves properly to use x-ray devices. The same is true for portable handheld x-ray devices.

Digital Doc XTG is an excellent portable x-ray system. It is a high frequency, advanced dental x-ray device. With a 60kVDC and 2mA tube current, it is built to produce high-quality x-ray, for both film and digital sensors. The devices can also be mounted on an optional tripod or on arms. Aside from improving efficiency in patient diagnosis, it is safe and easy to use the device for clinicians. The rest of the article will outline the key guidelines and safety precautions to follow while using the device.

Check the X-ray Device Package

First things first; as soon as you get the device open and assess all the components provided in the packaging for damage. The standard device packaging will consist of the device, power cable, the long cone, user manual, backscatter shied, the remote control switch (optional), and battery charger.

You must carry out the following preliminary checks:

  • Check if the device has serialized device label (usually on the back)
  • Inspect Collimator Cone and Backscatter Shield for any shipping damage
  • Check if Exposure Switch is functioning freely
  • Ensure that Device Housing has no cracks or fractures

You should also keep the following important points in mind:

  • Do not open the housing (enclosure)
  • Warranty will be rendered useless if you disassemble the main apparatus
  • Only trained personnel should repair the device
  • Gather information from an authorized distributor only

Dental X-Ray Radiation Prevention

Not only should you register properly and comply with all applicable regulations, but you should also consult the relevant state, provincial, and local regulations which govern radiation protection and use of x-ray equipment. The operator of the device should carefully follow all enforced regulations in relation to pregnant or expecting to be pregnant women. Operators of the device should also be completely familiar with the industry safety recommendations and permissible doses. To ensure optimal radiation backscatter protection you should:

  • Position the backscatter shield at a correct angle to the operator
  • Keep backscatter shield close to the patient
  • The patient tilts their head when required to do so
  • The operator stays immediately behind the permanently attached backscatter shield, in the Significant Zone of Occupancy

Only begin using the XTG when you are sure there will be no interruptions, putting other people under risk of being exposed to radiation. The assistant should also wear proper protective gear. In using Position Indicating Devices (PIDs), models allowing the operator to position the unit at the correct angle should be preferred. The depressed trigger can be used to end exposure at any given point. Low-class image detectors should not be used.

Duty Cycle and Usage of Dental X-ray

Xray2go has a maximum duty cycle rating of 1:60, and is designed in a manner to avoid overheating from excessive use. However, the device should not be used in an area with flammable material. The optimal battery voltage level for using XTG is 22.2 VDC, and it should not be operated on low voltage levels.

Proper Cleaning of Handheld X-ray

Before cleaning, you should ensure that the battery charger is unplugged. Keep the power of the device off while you clean it. To clean the device you can use non-alcohol based disinfectant wipes, a cloth with disinfectant liquid, or spray. The device is not water-proof, so care must be taken to not dampen it with any form of liquid. XTG should also not be sterilized.

Storing and Transporting the dental x-ray

For long term storage, the device should be stored in a place which is not affected by air pressure, temperature (cool), ventilation, humidity (dry), salt, dust, sunlight, etc. Be sure to avoid dropping or hitting the device while transporting or storing it.

Regular Maintenance on XTG Handheld X-ray

A technician should make an annual maintenance check on the device. You should also be wary of the accessories you use; if non-recommended accessories are used, they may damage the device.

Understanding Caries Detection Devices

understanding caries detection devices - digital doc

Understanding Caries Detection Devices

Over time, medicine has moved away from aggressive surgery to minimally invasive procedures as well as placing more emphasis on prevention and early detection. This change has been triggered by the need to lower the rates at which complications develop after surgery, as well as the need to reduce recovery time and the pain experienced by patients. Dentistry has also taken the same trajectory and caries detection devices, such as the LUM, have been introduced on the market in order to make it easier to catch caries early and reverse this condition before it costs patients their teeth. This article discusses some of the shortcomings of the traditional caries detection technology and also explores the benefits that the new crop of caries detection devices bring to the field of dentistry.

The Shortcomings of Traditional Caries Detection Technology

Radiographs: Radiography has been used for long in the fight against caries. However, this technology has one big weakness. Radiographs tend to be effective in alerting a dentist about the presence of caries once those caries have advanced and reached the dentinoenamel junction. In other words, radiographs can only detect caries with a high degree of accuracy once the bacteria causing caries has done so much damage that the dentine is starting to be exposed. This is unacceptable for dentists interested in minimally invasive dentistry since such severe damage requires invasive remedies or interventions.

Dental Explorers: dental explorers have also been used for long to examine the surface of teeth in order to find out which portions have caries. However, dental experts have been discouraging the use of these devices because the sharp tip of the explorer can compromise the portions of the teeth that are re-mineralizing. This can inadvertently give caries a chance to advance further.

The Benefits of Caries Detection Devices

The age of digital dentistry has ushered the dawn of caries detection devices like the LUM. These devices offer a variety of advantages or uses, such as the following;

Checking for caries before sealants are placed: Caries detection devices provide sub-enamel illumination so that dentists can use their findings to make various decisions. One of these pieces of information collected with the help of LUM is the state of any caries on the teeth before dental sealants are placed. This information can be captured more effectively once the caries detection tool is used alongside a high-quality intraoral camera, such as the IRIS HD USB 3.0 Dental Camera. The images captured can be analyzed thoroughly so that any caries detected can be treated before the sealants are put in place.

Assessing Re-mineralization Measures: Caries detection devices can also be used to monitor whether the measures to re-mineralize the teeth of a patient are working as expected, or not. The information gathered can be used to change the treatment plan if tangible results aren’t forthcoming, or a specific approach can be retained if it is bringing the desired outcomes. In this way, the time that would have been lost waiting for an ineffective method to bear fruit can be saved.

Monitoring Sealants: Caries detection devices have also shown their usefulness as a tool to help dentists to monitor the edges of dental sealants as time goes by. Any deterioration can be tracked so that a timely decision to replace the sealants can be made. This proactive approach could not have been possible if caries detection devices didn’t exist.

As you can see, caries detection devices like the LUM sub-enamel illumination device can add a whole new dimension to the ease with which your dental office can catch caries early. However, you should use these devices together with the other caries detection systems for better results. Contact Digital DOC for a virtual or in-office demo so that you can grasp how easy your work will become once this tool is available to you and your staff.

Creating a Productive Digital Dental Practice

Digital Doc - Creating a Productive Digital Dental Practice

Creating a Productive Digital Dental Practice

It can be daunting for a dental practitioner to select the most appropriate equipment and technologies from the wide array available on the market today. Moreover, the advertising and marketing efforts of manufacturers don’t make the task any easier. This article provides some actionable advice that you can implement while creating a productive digital dental practice.

Start from the Front Desk

Many dental practices make the costly mistake of thinking about the front desk last during the digitization process. However, front desk serves a key function in delivering outstanding service to patients and linking the back-end to various departments, such as billing. Therefore, it is advisable for you to start your digitization journey by procuring software solutions that can make the workflow smooth. For example, that software should be able to allow IRIS USB 2.0 Dental Chair Camera to send images directly to the patient’s digital file. Ultimately, eliminating the manual updating of files. In addition to this, patient’s rooms should be equipped with a large screen and digital software to educate and entertain them during their office visit.

Diagnostic Tools/Dental Technology

Next, consider digitizing the diagnostic equipment and technology so that your diagnostic process can be accurate and efficient. This is where caries detection tools like LUM and digital intraoral cameras like the IRIS Intraoral Dental Camera for Mac come in handy. Radiology tools, such as the XTG Handheld X-Ray, are also crucial during this phase of digitization. These digital tools will increase early detection and accurate diagnosis so that appropriate treatment can commence early.

Dental Treatment Tools and Dental Technology

There is a big reason why the tools and systems used to provide treatment may only be digitized once the diagnostics have been attended to. You can only start treatment after establishing what is wrong. Any mistake made during diagnosis will render any treatment given a nullity or require costly rework and extra visits by the patient. Remember, same-day services are now expected as the norm. So, the diagnosis should be spot on every single time so that proper treatment can be delivered to your patient.

Here, intraoral cameras like the IRIS HD USB 3.0 Dental Camera and software generate models of different smile designs, which come in handy when you’re setting treatment goals with your patient. You can also acquire fabrication equipment (3D printers and other milling equipment, for example) so that various restorations can be made in-house rather than outsourcing those services.

Data Backup for Your Dental Practice

Digitization increases the risk of data loss, so adequate attention should be devoted to backing up all data, preferably in the cloud. This type of backup system will keep the data of your dental practice secure from loss. It is important to appoint a person who has the knowledge of properly uploading the data to the cloud. This process can be automated so that any data capture is immediately sent to the cloud. A data backup system will save you from the headaches associated with data storage problems. Imagine how the reputation of your dental practice would suffer if a patient came to your office to review their smile after a year and you were unable to pull the images taken using IRIS intraoral cameras just before the treatment commenced!

Painting the Picture of the Ideal Visit

After implementing the digitization sequence suggested above, take time and think about what an ideal patient visit should be for your dental practice. Consider pain management, expedited care, cost-reduction and any other component that can bring the wow factor to your practice. Use that ideal picture to revisit the different categories of digitization as earlier discussed so that improvements or upgrades can be implemented on an ongoing basis. In this way, you will avoid the complacency that often creeps in when dental professionals complete the initial digitization of their practices. Continuous improvement is the hallmark of dental practices that rise to the top.

Efficiency, consistency, and accuracy will be a norm at your dental practice. All you need to do is follow the recommendations above when creating a productive digital dental practice.