
Tips for Taking Proper Digital Radiographs
Tips for Taking Proper Digital Radiographs in Your Practice
One of the most important advancements in dentistry is digital radiography. It saves time, and it’s less labor-intensive, has reduced radiation exposure, and makes patient diagnosis a breeze.
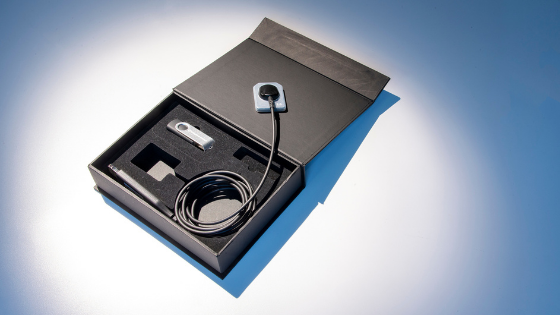
Radiographs are similar to dental x-rays, with the only difference being the digital sensor. Digital Doc’s Blū digital x-ray sensor captures crystal-clear images instantly. This makes radiographs an essential part of any dental practice. To make sure that you are using your new dental sensor properly, our Digital Doc team shares the following tips for taking proper digital radiographs.
Operating Your New Digital X-Ray Sensor
Below are a few tips on how to comfortably and properly take digital radiographs.
Maxillary Anterior
When taking a radiograph of the maxillary anterior segment, use a rolling scoop motion to position the sensor in the patient’s mouth. Make sure that you place the dental x-ray sensor parallel to the long axis of the teeth. After moving the sensor’s cable to one side, have the patient bite down onto the bite block. Once stable, you can press the exposure button.
Mandibular Anterior
A radiograph of the mandibular anterior segment may be a bit uncomfortable for the patient. To help with the discomfort, tell your patient to place the tip of their tongue to the lingual of their lower jaw incisor teeth. You can then use a rolling scoop motion and place the sensor on top of the tongue before rolling it into an upright position. The tongue acts as a cushion for any tender or sensitive soft tissue. Once the dental sensor has again been placed parallel to the teeth’s long axis and the bite block centered on the mandibular central incisors, the patient can then bite down on the block. When stability is achieved, you can press the exposure button.
Posterior Mandibular
A posterior mandibular segment x-ray can be uncomfortable for your patient. You can therefore use a foam cushion or gauze to provide some comfort. Ensure the cushioning you use is compatible with your digital dental sensor before use. To take the radiograph, retract the patient’s cheek using either an instrument or your finger and guide the intraoral sensor into the mouth, placing it between the teeth and the tongue at a 45º angle. Steadily move the sensor back till it’s level will the posterior teeth, either molars or premolars. Repeating the process again, move the cable out of the way, have the patient bite down on the bite block, and press the exposure button once stability is achieved.
Posterior Maxillary
The radiograph of your patient’s posterior maxillary segment employs the same technique as above, the only difference coming in during the positioning of the sensor and its angling. Unlike in the posterior mandibular segment x-ray, the best intraoral sensor is angled to capture the apices of the roots.
More Tips for Taking Proper Digital Radiographs
Apart from these detailed suggestions for taking digital radiographs, you can also:
Ensure you use the correct dental x-ray alignment
Correctly positioning your receptor as well as your handheld x-ray beam, ensures that the images come out clear. If either one or both are not positioned correctly, the teeth may appear overlapped, shortened, or elongated in the x-rays.
Ensure you include the patient’s whole mouth with the dental x-rays
Dr. Ben Kacos, a dentist in Shreveport, LA, says that he often takes full-mouth x-rays. If you are required to take a panoramic x-ray, include all the mouth sections, even those with missing teeth, such as when wisdom teeth have been removed.
Refrain from bending the x-ray film
Bending the receptor or film may result in unclear or distorted images. To counter this, either use rigid digital receptors as they cannot be bent and are made using hard plastic or use a receptor that best fits the patient’s mouth size when they bite.
Adjust exposure when taking an x-ray
For an x-ray to produce a properly exposed image, it should be noted that a larger mouth requires more light as compared to a smaller mouth. You should, therefore, adjust your exposure settings depending on the patient’s mouth size. As compared to a larger adult, a petite adult or child may require a lower setting. Failing to set your exposure correctly may produce images that are over or underexposed.
Make your patient comfortable
A patient who is uncomfortable tends to reposition themselves or move while the x-ray image is being captured. Those movements may cause the images produced to be poorly defined or blurry. You can help keep your patient still by:
- Ease their gag reflex. This can be done by telling your patient to hum, breathe deeply through their nose, or refocus their attention.
- Providing your patient with neck and head support before you capture the x-rays using your XTG portable dental x-ray.
Following these tips will ensure that your radiographs are of good diagnostic quality. If you need more help operating your new dental sensor by Digital Doc, our support team is happy to help. Are you interested in upgrading your dental sensor to Blū? Schedule your free virtual demonstration today.